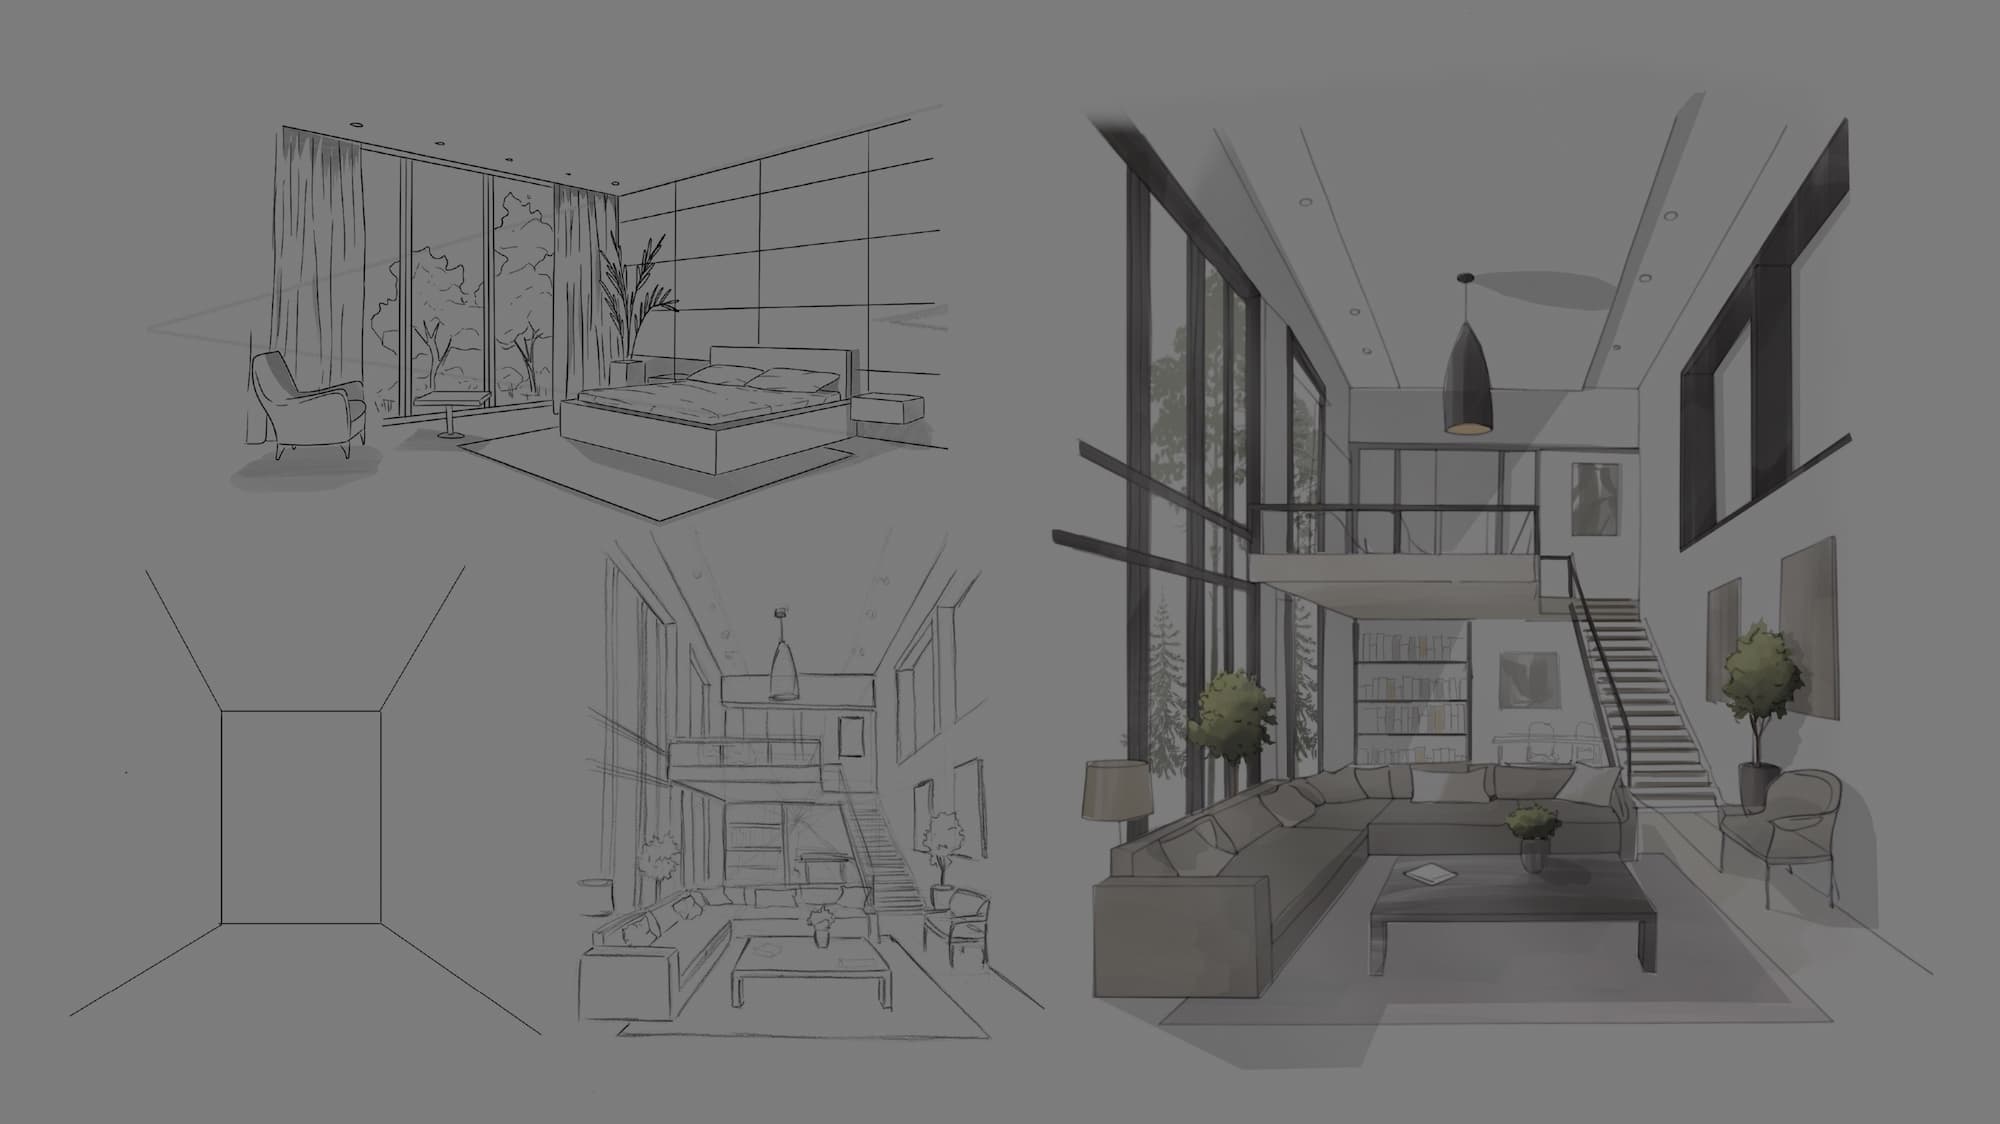
When drawing an interior, one of the most important decisions you’ll make is choosing the perspective. Which angle do you want to showcase? Will it be a view from the front, from a corner, or maybe even from a high vantage point? These choices shape how your design is perceived and highlight specific aspects of the space.
In this post, I’ll be showing you different ways to draw interior perspectives in architecture. Whether you’re just starting out or looking to refine your skills, I’ll guide you through one-point, two-point, and three-point perspectives—key techniques that can bring depth and realism to your architectural sketches.
Before we dive in, don’t forget to download the free PDF guide that accompanies this video.

Download the FREE PDF Interior Drawings by subscribing!
Choosing the Right Perspective: What’s the Message?
Selecting the right perspective for an interior drawing depends on the story you want to tell. What elements do you want to emphasize? Are you aiming to highlight a specific feature, like a window or a piece of furniture, or the overall space?
Each perspective type—one-point, two-point, and three-point—offers a different view and mood, so it’s crucial to choose the one that aligns with your vision while accurately representing the space.
Let’s break them down one by one.
One-Point Perspective: Simplicity and Focus
One-point perspective is the simplest form of perspective, making it perfect for beginners. It’s best used for drawings where the viewer is looking directly at one side of the scene, like a wall, creating a straightforward view. All the lines from the walls, ceiling, and floor converge to a single vanishing point, usually positioned in the center of the drawing.

Example 1: Imagine you’re standing in front of a wall with a window. All the lines from the side walls, ceiling, and floor recede towards the vanishing point at the center of the window. This creates a clear sense of depth while keeping the focus on that wall.
Example 2: Now, picture standing in front of a bed. In this case, all the walls, floor, and ceiling lines also converge toward the same vanishing point, but now the bed becomes the focal point.
Example 3: Finally, let’s say you want to show a view from above, like the room’s floor plan. You can use one-point perspective to give the floor depth while still conveying the dimensions of the room.

Key Tip: Make sure to position your vanishing point carefully to draw attention where you want it. One-point perspective is great for simple interior views, whether you’re focusing on different walls or the floor plan.
Two-Point Perspective: Depth from Multiple Angles
Two-point perspective is ideal for when you want to show a space from an angle, rather than directly facing one side. This is especially useful when you’re drawing rooms or buildings where the viewer is looking at a corner, allowing you to see two sides of the scene.
In two-point perspective, you use two vanishing points, typically placed on opposite sides of the horizon line. This technique adds more depth and realism by capturing the way objects recede towards different vanishing points.

Example 1: Picture standing at the corner of a bed and looking at the corner of the room. The walls of the room will recede towards two vanishing points on the horizon with all the windows and bed details.
Example 2: This time you’re standing in a room looking again at the corner, with all the lines of the wall, table, chair and decorations receding to the two vanishing points on the horizon line.

But be cautious—if your vanishing points are placed too close or too far apart, the drawing can look distorted. Experimenting with different placements can help you find the perfect balance for a natural, yet dramatic, effect.
Three-Point Perspective: Capturing Dramatic Depth and Height
Three-point perspective is perfect for creating dynamic and dramatic views, especially when you want to depict extreme angles. Unlike one- or two-point perspective, which primarily deals with objects viewed from the front or side, three-point perspective adds an extra vanishing point that accounts for height, whether you’re looking up or down at a scene. This technique is ideal for showcasing towering buildings or interiors with lofty ceilings, emphasizing both depth and height.

Example 1: Imagine standing in a bedroom and looking slightly down at the room, as if from a high viewpoint. In this case, you would have two vanishing points on the horizon, and a third vanishing point beneath the floor, that appears to stretch and the furniture recedes in a way that adds dimensionality, giving the room an immersive look.
Example 2: Now, picture a spacious living room with a tall ceiling. The third vanishing point makes the ceiling and walls appear even taller and more imposing, adding grandeur to the space.

That’s it for today’s tutorial! Remember, choosing the right perspective can transform how viewers experience your interior designs. One-point perspective is great for beginners and simple views, two-point perspective adds depth from multiple angles, and three-point perspective brings drama and grandeur to your drawings.
Be sure to download the free PDF that complements this video, and if you’re looking for more tips on perspective drawing, check out the other posts and videos, and make sure to subscribe to the newsletter!


